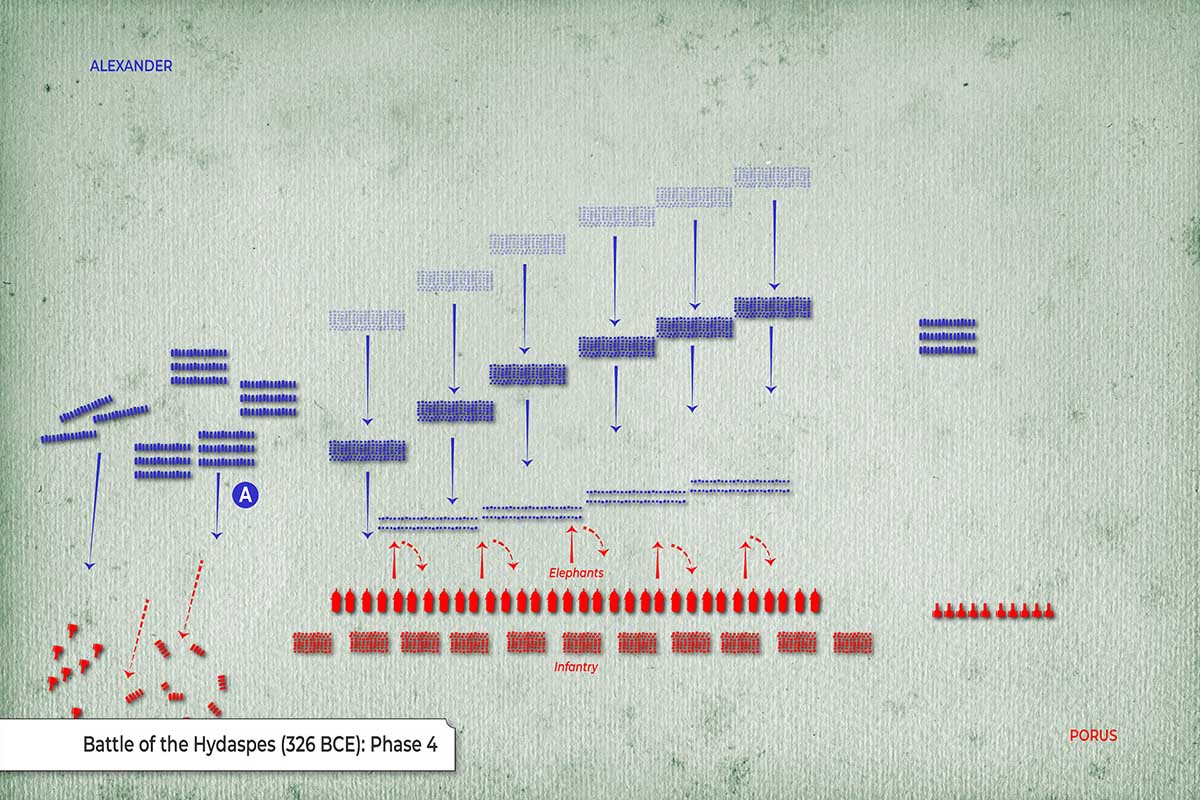
This map illustrates the climax of the Battle of the Hydaspes, showing the devastating effect of the Macedonian combined arms attack on the Indian forces. It captures the moment the Indian army’s formation collapses under the pressure of the infantry and cavalry attack.
The Elephant Battle and Phalanx Push
-
Elephant Confusion: Porus’s Elephants have charged, but they are now shown in a state of disorganization and distress (red curved arrows indicate confused movement). The Macedonian Phalanx has adapted its formation, advancing and retreating to draw out and harass the elephants, preventing a decisive breakthrough.
-
Infantry Engagement: The Macedonian infantry (Hypaspists, Phalanx) are now heavily engaged with the Indian Infantry, who are caught between the aggressive Macedonian push and the confused retreat of their own elephants.
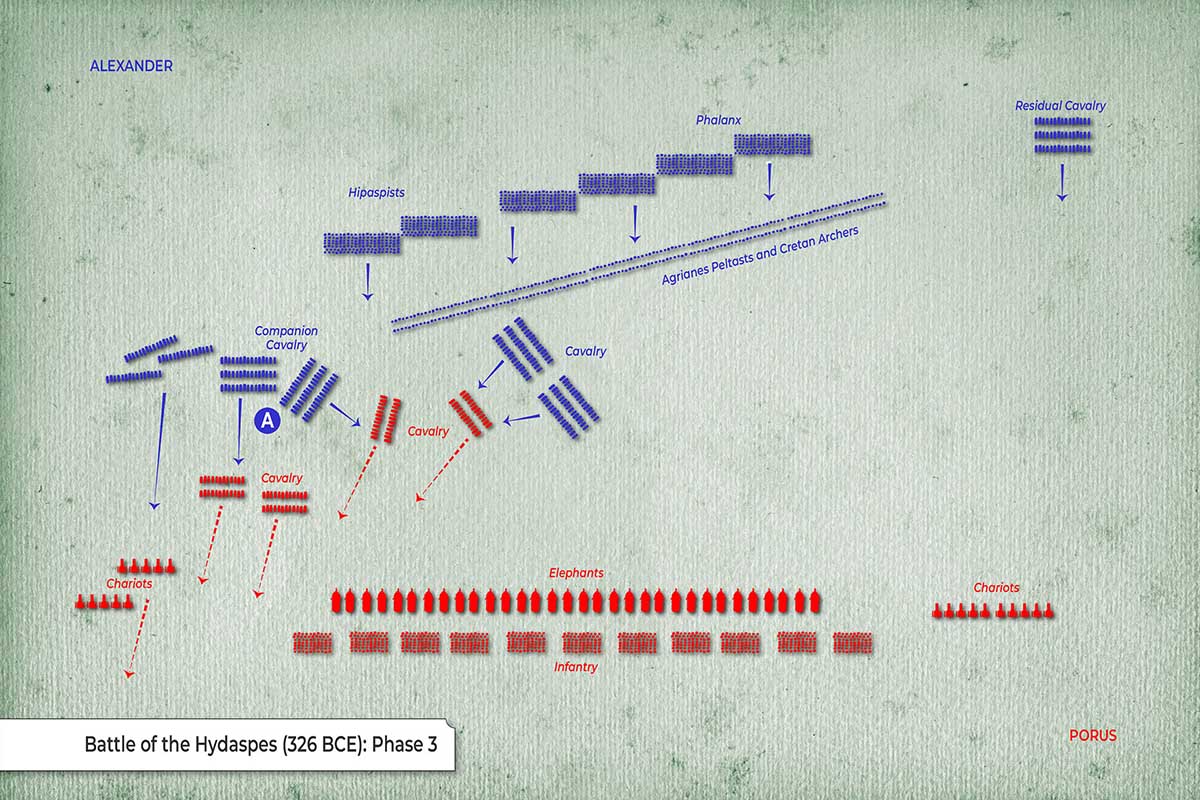
Final Envelopment
-
Cavalry Decimation: The Macedonian Cavalry (led by ‘A’) has completely decimated Porus’s left flank forces, which are now scattered units (red debris). This cavalry force is now turning inward toward the exposed rear of the Indian center.
-
Residual Cavalry Closure: The Residual Cavalry has completed its wide sweep and is engaging or moving to envelop Porus’s remaining right flank Cavalry and Chariots.
-
The Collapse: The map visually depicts the Indian army’s center being compressed from the front by the Phalanx and encircled by the Macedonian cavalry on both sides.