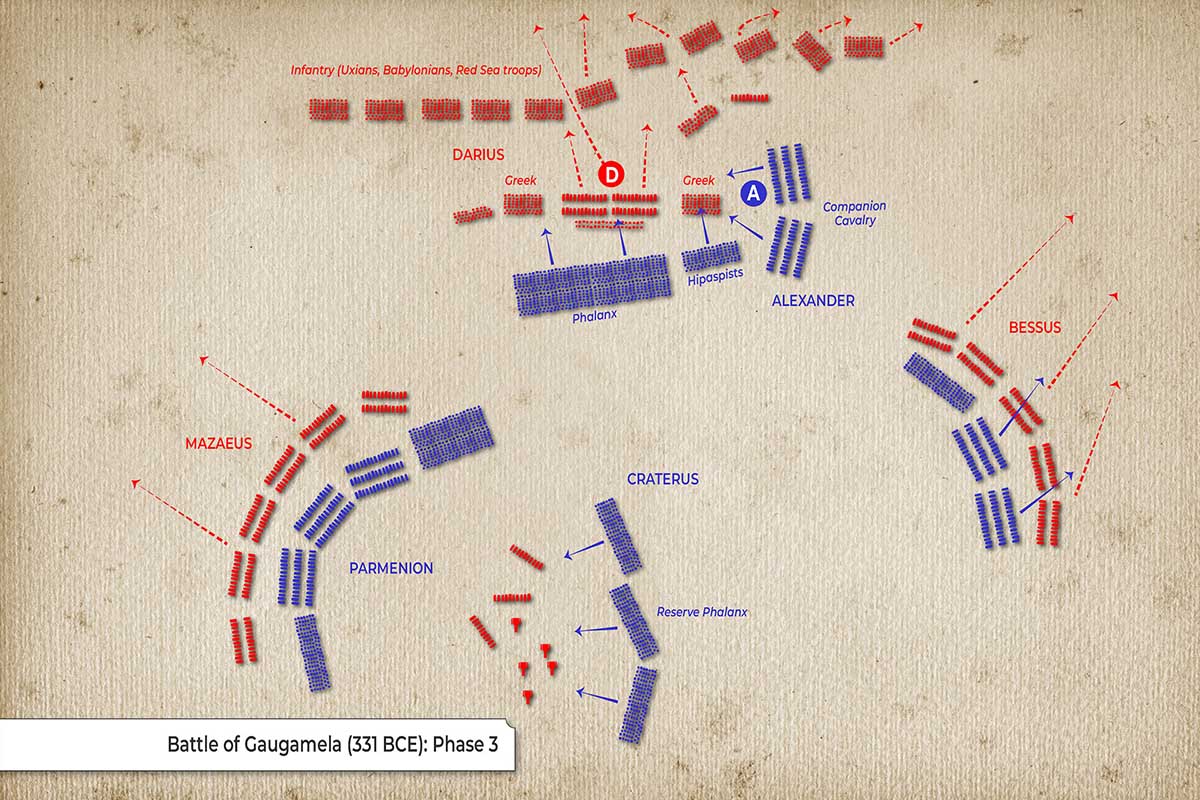
This map depicts the third phase of the Battle of Gaugamela. Here’s a brief overview of what’s shown in the map:
- Alexander and his Companion cavalry have burst through the Persian lines, directly threatening Darius, who begins to flee.
- The Macedonian phalanx pushes up; hypaspists pivot inward to widen the breach.
- Mazaeus (Persian left) and Bessus (Persian right) pull back; their cavalry streams off in retreat.
- Craterus uses the reserve phalanx to mop up raiders that slipped behind the line.
-
The Persian rear infantry disintegrates into general flight.
| Sector / Commander | What the map shows |
|---|---|
| Center – Darius | Darius flees; the Persian center breaks |
| Right – Alexander (A) | Companions inside the gap, facing Darius |
| Macedonian Center | Phalanx advancing; hypaspists turning inward |
| Left – Parmenion vs Mazaeus | Heavy melee; red dashed withdrawals |
| Persian Right – Bessus | Cavalry peeling away with dashed arrows |
| Rear/Reserve – Craterus | Reserve phalanx engaging scattered reds |


