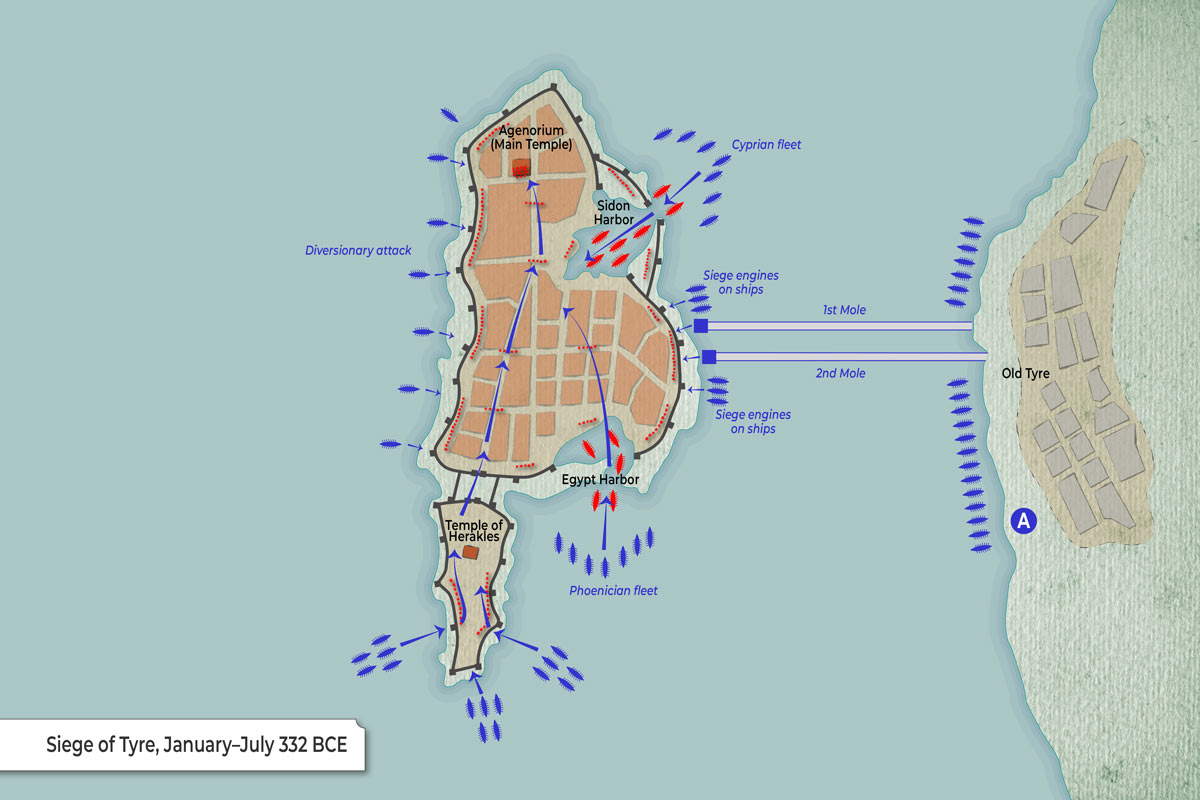
The map visualizes Alexander the Great’s innovative siege tactics during one of his most famous battles, the siege of Tyre, illustrating the coordinated land and naval operations that ultimately led to the city’s fall. The map shows how Alexander took Tyre by constructing a land bridge across the sea and bringing in a powerful navy to launch a combined land and sea assault.
Key Elements on the Map:
- Old Tyre (A): Located on the mainland to the east. Alexander began his siege here but had to build a mole (causeway) to reach the island city of Tyre.
- Two Moles (1st and 2nd Mole): Man-made causeways constructed by Alexander’s forces to connect the mainland with the island. These were vital in enabling the transport of siege equipment.
- Island of Tyre: The walled city is shown with:
- Sidon Harbor (north)
- Egypt Harbor (south)
- Temple of Herakles (southwest)
- Agenorium (Main Temple) in the north-central part of the city
Siege Tactics and Movements:
- Siege engines on ships: These were used along the eastern walls near the moles to break through Tyre’s defenses.
- Naval fleets:
- Cyprian fleet attacking from the north
- Phoenician fleet attacking from the south
- Diversionary attack: A maneuver on the western side of the city to distract Tyrian defenders.
- Arrows and red explosion symbols: Indicate main lines of assault and areas of conflict.
- Blue arrows inside the city: Suggest Alexander’s troops pushing inwards after breaching the city walls.


