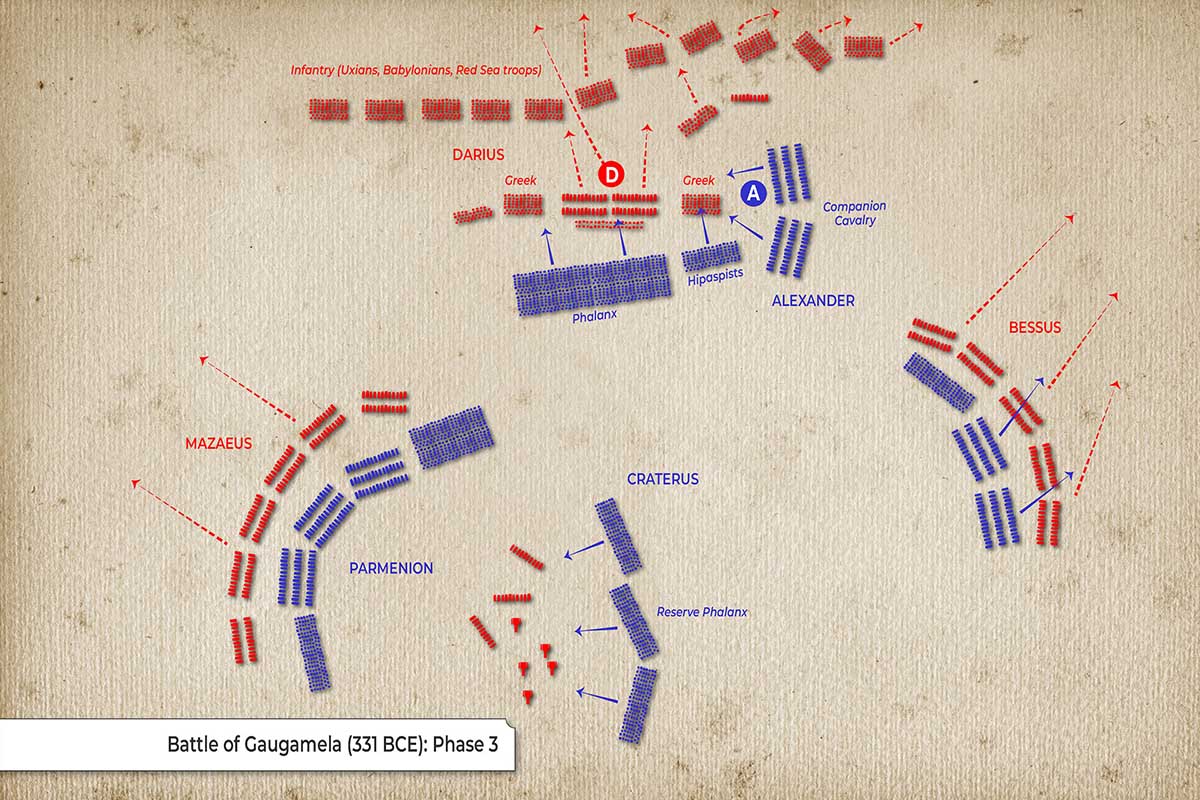
This map depicts the first phase of the Battle of Gaugamela. This was a decisive clash on 1 October 331 BCE near Gaugamela (northern Iraq) between Alexander the Great and Darius III. Alexander’s victory shattered the Achaemenid Empire and opened the road to Babylon, Susa, and Persepolis.
Overall layout
- Persians: A very broad front with strong cavalry wings, massed chariots, elephants, and a rear line of infantry (Uxians, Babylonians, Red Sea troops).
- Macedonians: A slightly oblique line—refused left under Parmenion, strong right under Alexander. The center is the phalanx with hypaspists on its right; the reserve phalanx is behind.
Movements indicated
- Multiple red arrows show Persian intentions: wing sweeps and chariot charges driving into the Macedonian line at several points.
- Small blue arrows near Parmenion suggest defensive adjustments or inward-facing posture on the Macedonian left.
Command & deployment snapshot
| Side | Commander | Wing/Section | Notable Units (as labeled) |
|---|---|---|---|
| Persia | Mazaeus | Left wing | Syrian & Mesopotamian Cav; Median Cav; Parthyaeans & Sacae; Albanians; Greeks; 50 chariots; Armenian & Cappadocian Cav |
| Persia | Darius (D) | Center | Persian Cav & Archers flanked by Greeks; 50 chariots; 15 elephants; rear infantry (Uxians, Babylonians, Red Sea troops) |
| Persia | — | Right-center | Caducians; Susians; Persians; 100 chariots |
| Persia | Bessus | Right wing | Bactrian Cav; Scythian Cav; (Bactrians, Dahae, Arachosians, Indians noted) |
| Macedon | Parmenion | Left wing | Thessalian Cav; Allied Cav; Thracian Cav; Thracian infantry |
| Macedon | Craterus | Center & reserve | Phalanx main line; reserve phalanx behind |
| Macedon | Alexander (A) | Right wing | Companion Cavalry; Hypaspists; Agrianians (javelin-men); Mercenary & Paeonian Cav; Macedonian archers |