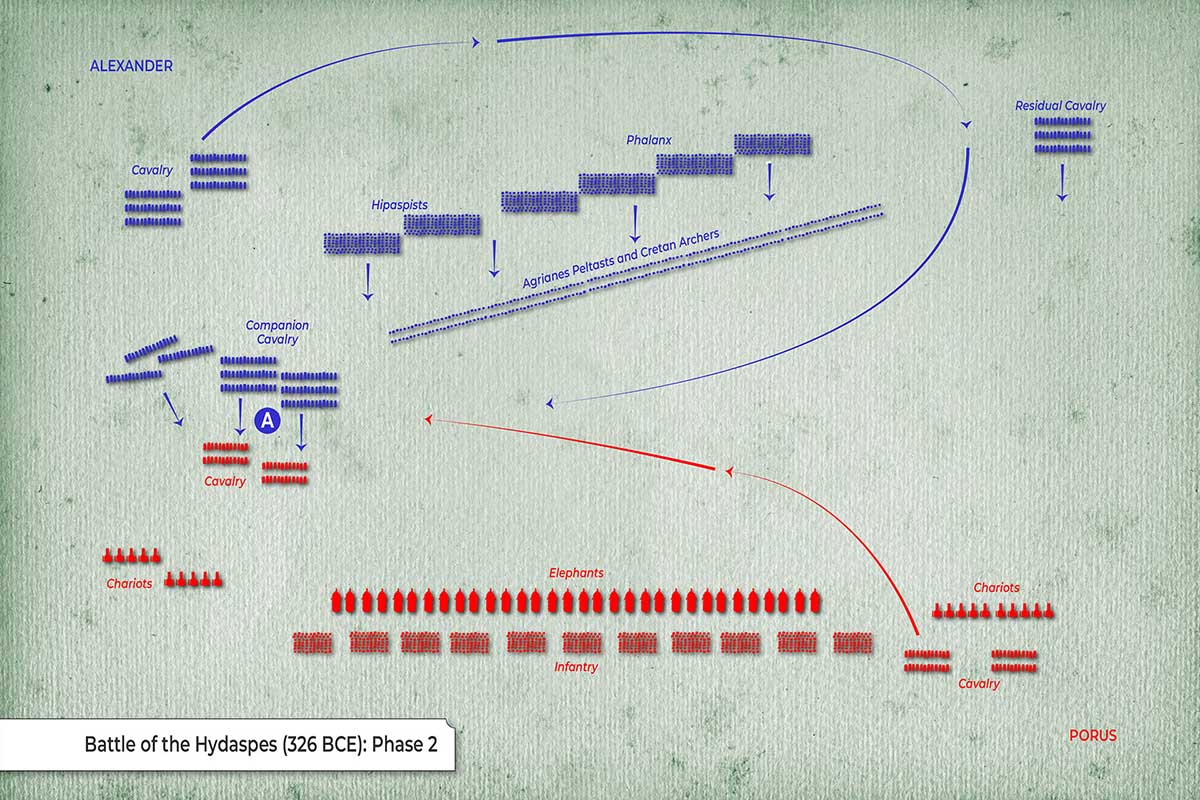
This map depicts the battle as the flanking maneuver connects and the engagement transitions into heavy cavalry combat on the Indian left flank. This phase highlights the breakdown of Porus’s cavalry defense and the initiation of the hammer-and-anvil tactic.
Cavalry Engagement and Envelopment
-
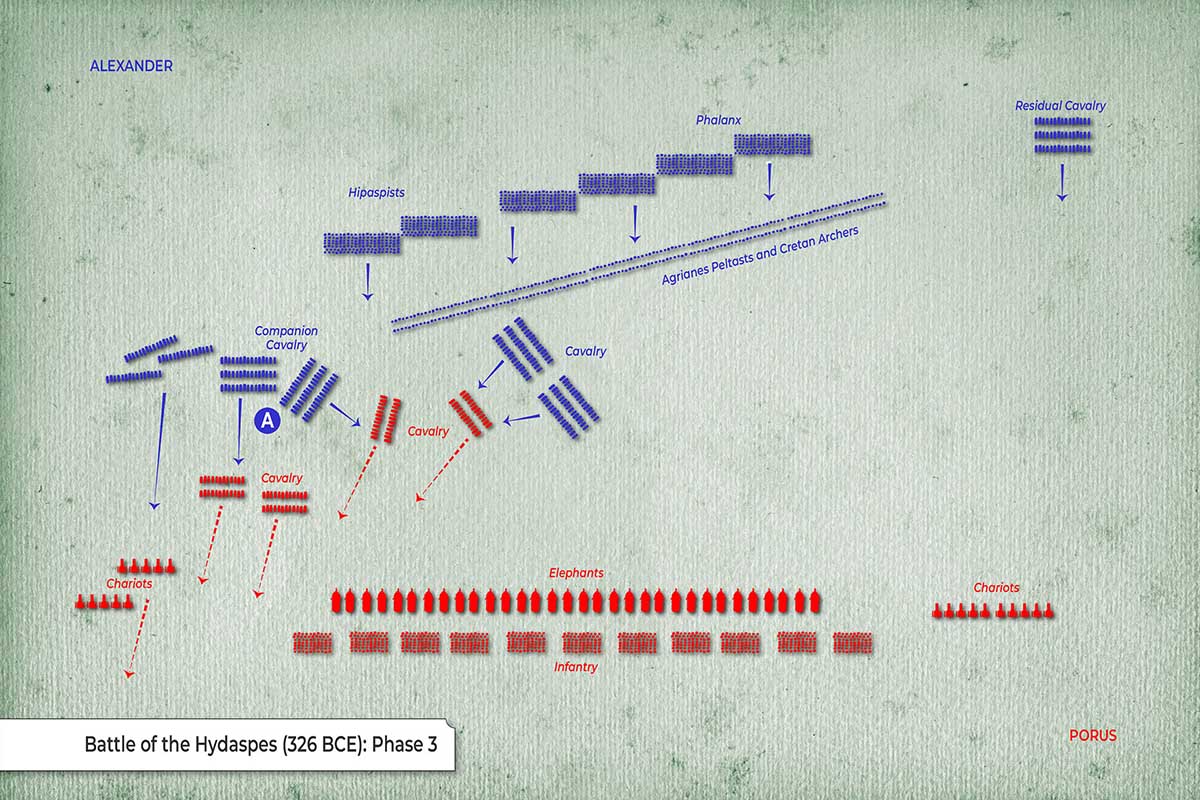
Porus’s Left Cavalry Routed: Porus’s Cavalry and Chariots on the left flank have been heavily engaged and are shown breaking (red scattered units).
-
The Second Cavalry Wave: A second detachment of Macedonian Cavalry has successfully moved around Porus’s broken left flank, creating a double envelopment near the Indian left center. The red units are now surrounded by Macedonian cavalry, who form a tight, pincer-like formation.
-
The Phalanx Advance: The Macedonian Phalanx and Hypaspists begin their advance toward the enemy center, maintaining a disciplined line to ensure they remain intact when facing the elephants.
The Impending Elephant Charge
-
Porus’s Countermeasure: The map shows Porus’s cavalry retreating toward the center. This movement likely signals that Porus is preparing to unleash his central and most powerful units—the Elephants—against the advancing Macedonian infantry.
-
Porus’s Right Flank: The Cavalry and Chariots on Porus’s right flank remain static but are now the target of the Residual Cavalry sweeping around from Alexander’s right. The battle is quickly developing into a complete encirclement.