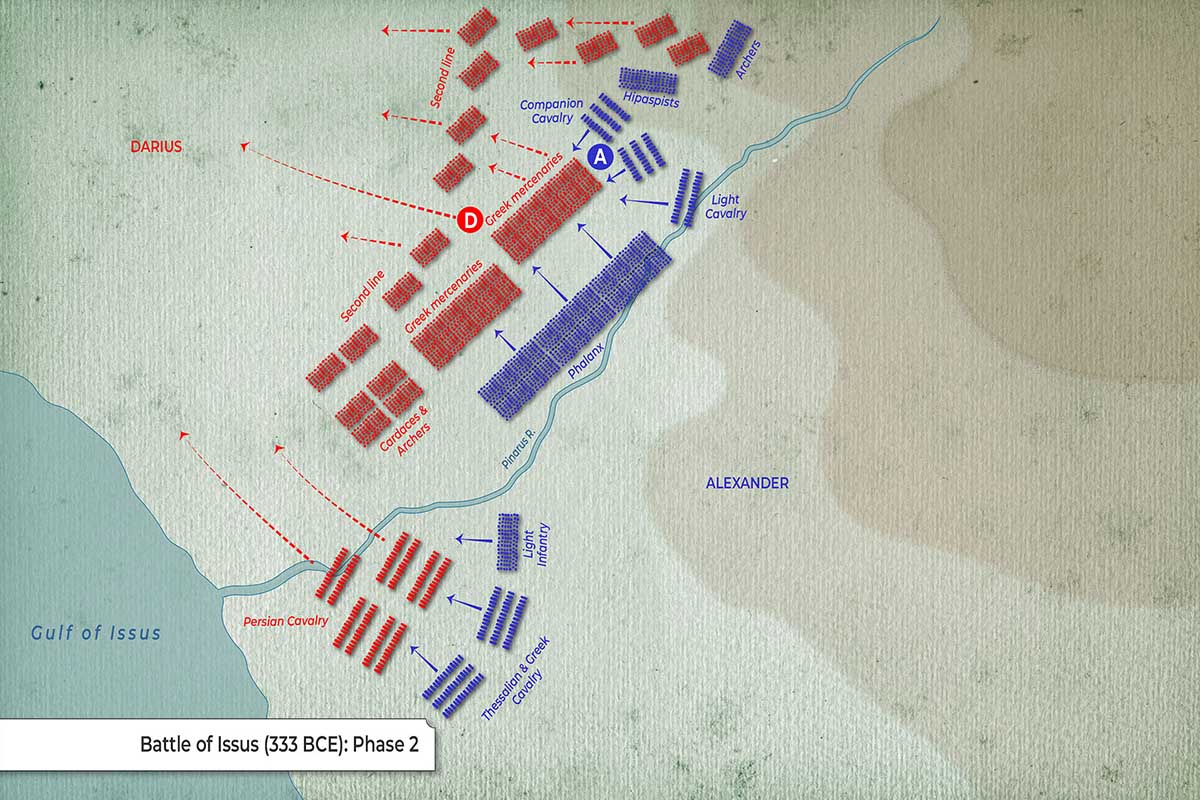
This map illustrates the climax and decisive turning point of the Battle of Issus (333 BCE). It captures the moment Alexander’s tactical gamble pays off, leading to the collapse of the Persian line and the flight of King Darius III.
Alexander’s Tactical Breakthrough (Blue)
In this phase, the Macedonian army executes a high-speed assault that exploits the gaps in the Persian formation.
- The Right-Wing Charge: Alexander (designated ‘A’) leads the Companion Cavalry in a devastating charge across the river. They have successfully smashed through the Persian left, clearing the way for the Hipaspists to follow.
- The Center: The Macedonian Phalanx is shown in the process of crossing the Pinarus R. While they face heavy resistance from the Persian Greek mercenaries, their forward momentum maintains pressure on the center.
- The Left Flank: Near the coast, the Thessalian & Greek Cavalry continue to hold their ground, successfully absorbing the Persian cavalry’s charge and preventing the Macedonian line from being outflanked.
The Persian Collapse (Red)
As the Macedonian right wing pierces the line, the Persian command structure and formation begin to dissolve.
- The Flight of Darius: King Darius (designated ‘D’), seeing Alexander’s cavalry charging directly toward his position, has turned his chariot to flee the battlefield (indicated by the red dashed arrow).
- Disintegrating Wings: The Cardaces & Archers on the Persian left wing are in full retreat (dotted red arrows), unable to withstand the shock of the Companion Cavalry.
- Cavalry Withdrawal: On the coastal flank, the Persian Cavalry, despite their initial numerical advantage, are seen retreating (red dashed arrows) as the news of Darius’ flight spreads and the Macedonian center advances.
The Turning Point
The map highlights the “oblique” nature of Alexander’s success. By concentrating his best troops (the Companions) on the right and striking a specific weak point in the Persian line, Alexander created a “domino effect.” Once the Persian left broke and Darius fled, the superior numbers of the Persian army became a liability, leading to a chaotic and bloody retreat.


