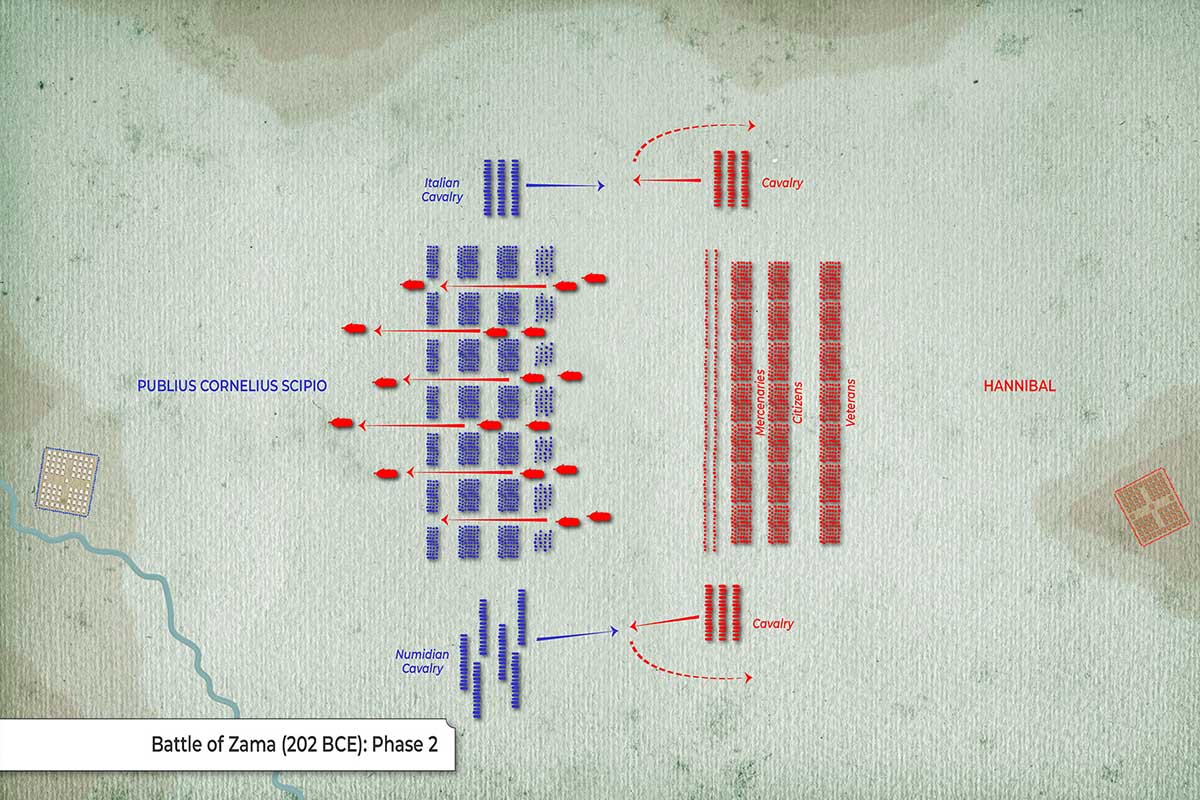
This map depicts the second phase of the Battle of Zama, the battle that decided the course of the Second Punic War.
- The war elephants used in Phase 1 are now shown passing through or around the Roman lines, indicated by red elephant icons moving backward.
- Carthaginian cavalry on both flanks is shown retreating, pursued by Roman and Numidian cavalry.
- Both Roman cavalry groups are advancing outward while the Carthaginian cavalry is breaking away, preparing to leave the field.
Roman Deployment (Blue) — Table
| Unit / Feature | Notes |
|---|---|
| Publius Cornelius Scipio | Roman commander |
| Velites | Light infantry opening lanes for elephant passage |
| Hastati | Reforming after elephant disruption |
| Principes | Holding formation |
| Triarii | Reserve spearmen |
| Italian Cavalry | Engaging and pushing back Carthaginian cavalry |
| Numidian Cavalry | Chasing Carthaginian cavalry on the bottom flank |
| Movement | Romans maintaining discipline while cavalry initiates pursuit |
Carthaginian Deployment (Red) — Table
| Unit / Feature | Notes |
|---|---|
| Hannibal | Carthaginian commander |
| Elephants | Shown exiting or bypassing Roman lanes |
| Mercenaries | Preparing to engage the reorganized Roman front |
| Citizens | Middle Carthaginian infantry block |
| Veterans | Highly experienced core troops |
| Cavalry (Top) | Withdrawing under Roman pressure |
| Cavalry (Bottom) | Also falling back, pursued by Numidians |
| Movement | Elephants moving past Romans; cavalry retreating |


