After the disintegration of the Roman West in the late fifth century CE, the Western Roman territory was occupied by barbarian successor states. In the East, however, the Roman Empire survived, with emperors holding court in Constantinople. For most of the century, the Eastern Roman Empire was on the defensive, fighting the Hunnic threat in the West and Sassanid Persians in the East.
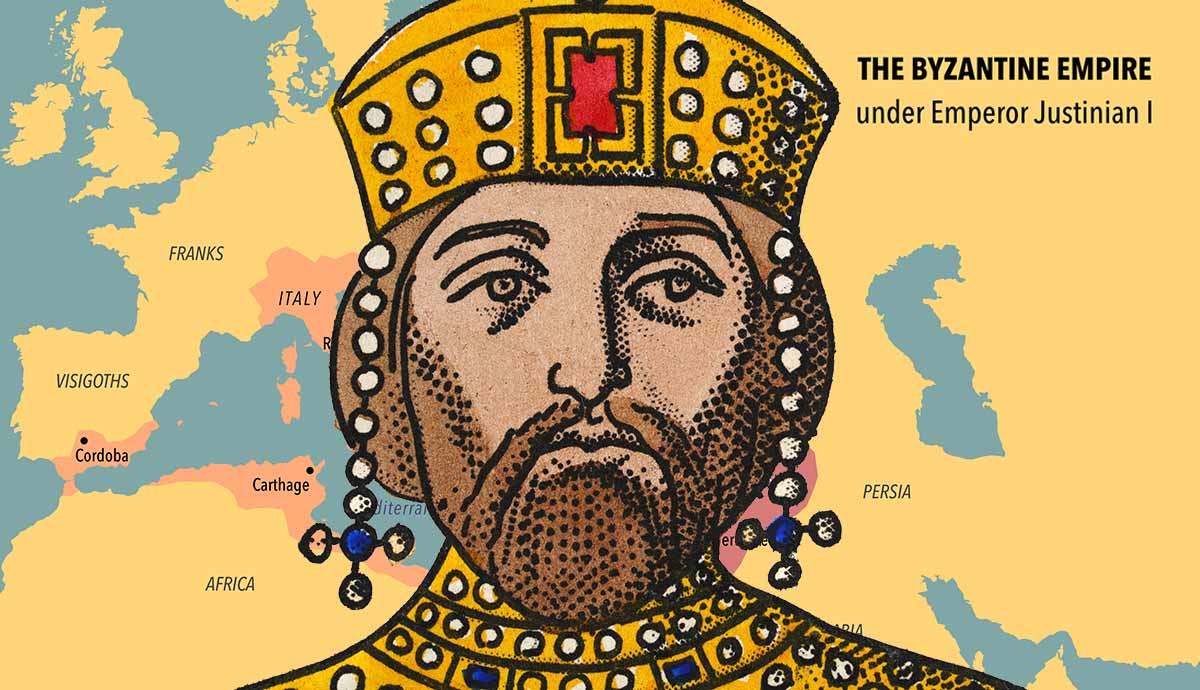
Things changed in the early sixth century when emperor Justinian dispatched the imperial army on the last major western offensive. Northern Africa was recovered in a swift campaign, erasing the Vandal kingdom from the map. Italy, however, turned into a bloody battleground, with the Romans defeating Ostrogoths after two decades of costly conflict. Most of Italy, ruined by war and plague soon succumbed to the Lombards. In the East, the Empire spent the early 600s in the life-and-death struggle against the Sassanids. Rome ultimately won the day, inflicting a humiliating defeat on its greatest rival. Yet, the hard-fought victory lasted less than a few years. Over the next century, Islamic Arab armies delivered a heavy blow, from which Constantinople never recovered. With all the eastern provinces and much of the Balkans lost, the Eastern Roman Empire (also known as the Byzantine Empire) turned to the defensive.
1. Battle of Dara (530 CE): Eastern Roman Empire’s Triumph in the East

After the fateful defeat of Crassus, the Roman armies fought many wars against Persia. The Eastern front was the place to gain military glory, boost legitimacy, and attain wealth. It was also the place where many would-be conquerors, including emperor Julian, met their doom. At the dawn of the sixth century CE, the situation remained the same, with the Eastern Roman Empire and Sassanid Persia engaging in border warfare. This time, however, Rome would win a splendid victory, opening the possibility of realizing emperor Justinian’s dream – reconquest of the Roman West.
Justinian inherited the throne from his uncle Justin. He also inherited the ongoing war with Persia. When Justinian tried to negotiate, the Sassanid king Kavadh responded by sending a massive army, 50,000 men strong, to take the Roman key fort of Dara. Situated in Northern Mesopotamia, on the border with the Sassanid Empire, Dara was a vital supply base, and the headquarters of the eastern field army. Its fall would have weakened the Roman defenses in the area and limited its offensive capabilities. It was paramount to prevent that from happening.

The imperial army’s command was given to Belisarius, a promising young general. Before Dara, Belisarius distinguished himself in the battles against the Sassanids in the Caucasus area. Most of those battles ended in a Roman defeat. Belisarius was not a commanding officer at the time. His limited actions saved the lives of his soldiers, gaining the emperor’s favor. However, Dara would be his greatest challenge yet. The imperial army was outnumbered two to one by the Persians, and he could not count on the reinforcements.
Despite the odds not being in his favor, Belisarius decided to give battle. He chose to confront the Persians in front of the Dara fortress walls. To neutralize mighty Persian armored cavalry – the clibanarii – the Romans dug several ditches, leaving gaps between them for a potential counterattack. At the flanks, Belisarius placed his light cavalry (mainly comprised of Huns). The center trench in the background, protected by the archers on the city walls, was occupied by the Roman infantry. Behind them was Belisarius with his elite household cavalry.

The historian Procopius, who also acted as Belisarius’ secretary, left us a detailed battle account. The first day passed in several challenging fights between champions of opposing sides. Allegedly, the Persian champion challenged Belisarius to single combat but was instead met and killed by a bath slave. Following Belisarius’ failed attempt to negotiate peace, the Battle of Dara took place the next day. The engagement began with a prolonged exchange of arrow fire. Then the Sassanid clibanarii charged with their lances, first on the Roman right flank and then on the left. The imperial horsemen repelled both attacks. The sweltering desert heat, with the temperature reaching 45°C, further hampered the assault of the mail-clad warriors. The clibanarii who managed to cross the ditch found themselves under the attack of mounted Hunnic archers who left their concealed positions, and Belisarius’ elite heavy cavalry.
Once the Sassanid horsemen had been savaged, the infantry fled the battlefield. Most managed to escape, as Belisarius refrained his cavalry from a potentially dangerous pursuit. 8,000 Persians were left dead on the battlefield. The Romans celebrated a great victory, employing only defensive tactics, and keeping the infantry out of combat. Although the imperial forces suffered a defeat a year later at Callinicum, the tactics used at Dara would become a staple of the Eastern Roman Empire’s strategy, with a small but well-trained army and the cavalry as its striking power.
Despite renewed Persian attacks in 540 and 544, Dara remained under Roman control for thirty more years. The fort changed hands several more times until the Arab conquest in 639, after which it became one of many fortified outposts deep within the enemy’s territory.
2. Tricamarum (533 CE): The Roman Reconquest of North Africa

In Summer 533 CE, emperor Justinian was ready to realize the long-awaited dream. After more than a century, the imperial armies were preparing to land on the shores of North Africa. The once crucial imperial province was now the core of the powerful Vandal Kingdom. If Justinian wanted to eliminate the Vandals, his direct competitors in the Mediterranean, he had to take the Kingdom’s capital, the ancient city of Carthage. The opportunity was presented after Eastern Roman Empire signed peace with Sassanid Persia. With the Eastern Front secured, Justinian dispatched his faithful general Belisarius at the head of the relatively small expeditionary army (counting around 16,000 men, 5,000 of them cavalry) to Africa.
In September 533, the force landed in Tunisia and advanced on Carthage by land. At a place called Ad Decimum, Belisarius won a spectacular victory over the Vandal army led by king Gelimer. A few days later, the imperial troops entered Carthage in triumph. The victory was so complete and swift that Belisarius feasted on the dinner prepared for Gelimer’s triumphal return. But, while Carthage was again under imperial control, the war for Africa was not over yet.

Gelimer spent the following months raising a new army, and then set out to fight the Roman invaders. Rather than risk the siege, Belisarius opted for a pitched battle. Furthermore, Belisarius doubted the loyalty of his Hunnic light cavalry. Before the showdown, Gelimer’s agents in Carthage tried to sway the Hunnic mercenaries to the Vandal side. Leaving some of his infantry in Carthage and other African towns, to prevent a revolt, Belisarius marched his small army (around 8,000) to meet the enemy. He placed his heavy cavalry at the front, the infantry in the center, and the problematic Huns at the column’s rear.
On 15th December, the two forces met near Tricamarum, some 50 km west of Carthage. Once again, the Vandals possessed a numerical advantage. Facing a superior enemy and doubting the loyalty of his own forces, Belisarius had to win a quick and decisive victory. Deciding not to give the enemy time to prepare for battle, the general ordered a heavy cavalry charge, while the Roman infantry was still on the way. Many Vandal nobles perished in the attack, including Gelimer’s brother, Tzazon. When the infantry joined the battle, the Vandal route became complete. Once they saw that the imperial victory was a matter of time, the Huns joined in, delivering a thundering charge that shattered what remained of the Vandal forces. According to Procopius, 800 Vandals died that day, compared to only 50 Romans.

Gelimer managed to flee the battlefield with his remaining troops. Having realized that the war was lost, he surrendered the following year. The Romans were the undisputed masters of North Africa once again. With the fall of the Vandal Kingdom, the Eastern Roman Empire regained control over the rest of the former Vandal territory, including the isles of Sardinia and Corsica, Northern Morocco, and the Balearic Islands. Belisarius was awarded a triumph in Constantinople, an honor given only to the emperor. The eradication of the Vandal Kingdom and minor losses among the expeditionary force encouraged Justinian to plan the next step of his reconquest; the invasion of Sicily, and the ultimate prize, Rome.
3. Taginae (552 CE): The End of Ostrogothic Italy

By 540, it looked like a total Roman victory was on the horizon. Within five years of Belisarius’ Italian campaign, the imperial forces subjugated Sicily, reconquered Rome, and restored control of the entire Apennine peninsula. The once mighty Ostrogoth kingdom was now reduced to a single stronghold in Verona. In May, Belisarius entered Ravenna, taking the Ostrogoth capital for the Eastern Roman Empire. Instead of a triumph, the general was promptly recalled to Constantinople, suspected of planning to revive the Western Empire. Belisarius’ sudden departure allowed the Ostrogoths to consolidate their forces and counterattack.
The Goths, under their new king Totila, had several factors on their side, in their fight to restore control over Italy. The outbreak of the plague devastated and depopulated the Eastern Roman Empire, weakening its military. In addition, the renewed war with Sassanid Persia forced Justinian to deploy most of his troops in the East. Perhaps most importantly for the Gothic war, the incompetence and disunity within the Roman high command in Italy undermined army’s capability and discipline.

Yet, the Eastern Roman Empire remained a powerful opponent. With Justinian unwilling to make peace, it was only a matter of time for the Roman forces to arrive with a vengeance. Finally, in mid-551, after signing a new treaty with the Sassanids, Justinian dispatched a large army to Italy. Justinian gave Narses, an old eunuch, the command of around 20 000 troops. Interestingly, Narses was also a competent general who enjoyed respect among the soldiers. Those qualities would prove crucial in the incoming clash with the Ostrogoths. In 552, Narses reached Italy by land and advanced south towards Ostrogoth-occupied Rome.
The battle that would decide the master of Italy unfolded at a place called Busta Gallorum, near the village of Taginae. Totila, finding himself outnumbered, had limited options. To bid time until his reinforcements arrived, the Ostrogoth king tried to negotiate with Narses. But the veteran politician was not fooled by the ruse and deployed his army in a strong defensive position. Narses placed Germanic mercenaries in the center of the battle line, with the Roman infantry on their left and right. On the flanks, he stationed the archers. The latter would prove crucial in deciding the battle’s outcome.

Even after his reinforcements had arrived, Totila still found himself in an inferior position. Hoping to take the enemy by surprise, he ordered a cavalry charge upon the Roman center, trying to punch a hole through the hostile infantry, known to be the weakest element of the imperial army. Narses, however, was ready for such a move, with Gothic cavalry coming under concentrated crossfire from the archers, both mounted and on foot. Thrown back in confusion, the Ostrogoth horsemen were then surrounded by the Roman armored cavalry. By the evening, Narses ordered a general advance. The Gothic cavalry fled the battlefield, while the enemy infantry’s retreat soon turned into a rout. A massacre ensued. Over 6,000 Goths lost their lives, including Totila, who perished in the struggle. A year later, the decisive Roman victory at Mons Lactarius brought the Gothic war to an end, relegating the once-proud Ostrogoths to the dustbin of history.
The imperial armies spent thirty more years pacifying the lands and cities across the Po river, until 562 when the last hostile stronghold fell into Roman hands. The Eastern Roman Empire was finally an undisputed master of Italy. Yet, the Roman triumph did not last long. Weakened by protracted warfare and the plague and confronted with widespread devastation and ruin across the entire peninsula, the imperial armies could not mount an effective defense against the invaders from the north. Only three years after Justinian’s death in 565, most of Italy fell to the Lombards. With the imperial armies redeployed to the Danube and on the Eastern Front, the newly established Exarchate of Ravenna remained on defense until its fall in the mid-8th century.
4. Niniveh (627 CE): Triumph Before the Fall

Justinian’s wars recovered much of the former imperial territories in the West. However, it also overextended the Eastern Roman Empire, putting a heavy strain on limited resources and manpower. Thus, the imperial armies could do little to stop the relentless pressure on the frontiers, both in the East and West. By the early seventh century, the fall of the Danubian limes resulted in the loss of most of the Balkans to Avars and Slavs. At the same time, in the East, the Persians under king Khosrau II advanced deep into the imperial territory taking Syria and Egypt, and most of Anatolia. The situation was so dire that the enemy forces reached the walls of the capital, placing Constantinople under siege.
Instead of surrendering, the reigning emperor Heraclius made a daring gamble. Leaving a token garrison to defend the capital, in 622 CE, he took command of the bulk of the imperial army and sailed to the northern coast of Asia Minor, determined to bring the fight to the enemy. In a series of campaigns, Heraclius’ troops, bolstered by their Turkic allies harassed the Sassanid forces in the Caucasus.

The failure of the siege of Constantinople in 626 further raised Roman spirits. As the war neared close to its 26th year, Heraclius made a bold and unexpected move. In late 627, Heraclius launched the offensive into Mesopotamia, leading 50,000 troops. Despite the desertion by his Turkic allies, Heraclius made limited successes, ravaging and plundering Sassanid lands and destroying holy Zoroastrian temples. The news of the Roman assault threw Khosrau and his court into a panic. The Sassanid army was exhausted by the prolonged war, its crack troops and best commanders employed elsewhere. Khosrau had to stop the invaders quickly, as Heraclius’ psychological warfare – the destruction of holy sites – and the Roman presence in the Sassanid heartlands threatened his authority.
After months of avoiding the main Sassanid army in the area, Heraclius decided to confront the enemy in the pitched battle. In December, the Romans met the Sassanid forces near the ruins of the ancient city of Nineveh. From the outset, Heraclius was in a better position than his opponent. The imperial army outnumbered the Sassanids, while the fog reduced the Persian advantage in archery, allowing the Romans to charge without great losses from missile barrages. The battle started early in the morning and lasted for eleven grueling hours.

Heraclius, always in the thick of the fighting, eventually came face to face with the Sassanid general and severed his head with a single blow. The loss of their commander demoralized the enemy, with the resistance melting away. As a result, the Sassanids suffered a heavy defeat, losing 6,000 men. Instead of advancing on Ctesiphon, Heraclius continued to plunder the area, taking the Khosrau’s palace, gaining great riches, and, more importantly, recovering 300 captured Roman standards accumulated over years of warfare.
Heraclius’ clever strategy bore fruit. Confronted with the ruination of the imperial hinterland, the Sassanids turned against their king, overthrowing Khosrau in a palace coup. His son and successor Kavadh II sued for peace, which Heraclius accepted. Yet, the victor decided not to impose harsh terms, asking instead for the return of all the lost territories and restoration of the fourth-century boundaries. In addition, the Sassanids returned the prisoners of war, paid war reparations, and most importantly, returned the True Cross and other relics taken from Jerusalem in 614.
Heraclius’ triumphal entry in Jerusalem in 629 marked the end of the last great war of antiquity and the Roman Persian wars. It was a confirmation of Roman superiority and the symbol of Christian victory. Unfortunately for Heraclius, his great triumph was almost immediately followed by a wave of Arab conquests, which negated all his gains, resulting in the loss of the large swathes of the Eastern Roman Empire’s territory.
5. Yarmuk (636 CE): Eastern Roman Empire’s Tragedy

The long and devastating war between Sassanid and Eastern Roman Empire weakened both sides and undermined their defenses at a crucial moment when a new threat appeared on the horizon. While the Arab raids were initially ignored (raids were recognized phenomena in the area), the defeat of combined Roman-Persian forces at Firaz warned both Ctesiphon and Constantinople that they now faced a much more dangerous enemy. Indeed, the Arab conquests would shatter the power of two colossal empires, causing the fall of the Sassanids and the loss of much of the Roman territory.
The Arab attacks caught the Eastern Roman Empire unprepared. In 634 CE, the enemy, who mainly relied on mounted light troops (including cavalry and camels), invaded Syria. The fall of Damascus, one of the major Roman centers in the East, alarmed emperor Heraclius. By Spring 636, he raised a large multiethnic army, numbering up to 150,000 men. While the imperial forces vastly outnumbered the Arabs (15 – 40,000), the sheer army’s size required several commanders to lead it into the battle. Unable to fight, Heraclius provided supervision from distant Antioch, while the overall command was given to two generals, Theodore and Vahan, the latter acting as a supreme commander. The much smaller Arab force had a simpler chain of command, led by a brilliant general Khalid ibn al-Walid.

Realizing the precarity of his position, Khalid abandoned Damascus. He massed the Muslim armies at a large plain south of the Yarmuk river, a major tributary of the Jordan river, now border between Jordan and Syria. The area was ideally suited for Arab light cavalry, which accounted for a quarter of his army’s strength. The vast plateau could also accommodate the imperial army. Yet, by moving his forces at Yarmuk, Vahan committed his troops to a decisive battle, which Heraclius tried to avoid. Furthermore, by concentrating all five armies in one place, the underlying tensions between commanders and the soldiers belonging to different ethnic and religious groups came to the fore. The result was decreased coordination and planning, which contributed to the catastrophe.
Initially, the Romans tried to negotiate, wishing to strike simultaneously with the Sassanids. But their newfound ally required more time to prepare. A month later, the imperial army moved to attack. The Battle of Yarmuk began on 15th August and lasted for six days. While the Romans gained limited success during the first few days, they could not deal the decisive blow to the enemy. The closest that the imperial forces came to victory was the second day. The heavy cavalry broke through the enemy center, causing Muslim warriors to flee to their camps. According to the Arab sources, the ferocious women forced their husbands to return to battle and drive the Romans back.

Throughout the battle, Khalid aptly used his mobile guard cavalry, inflicting heavy damage on the Romans. The Romans, for their part, failed to achieve any breakthrough, which caused Vahan to request a truce on the fourth day. Knowing that the enemy was demoralized and exhausted by a protracted battle, Khalid decided to take the offensive. The night before the assault, the Muslim horsemen cut all the exit areas from the plateau, taking control over the crucial bridge over the Yarmuk river. Then, on the final day, Khalid mounted a major offensive utilizing a massive cavalry charge to defeat the Roman cavalry, which had begun to mass in response, just not quickly enough. Surrounded on three fronts and with no hope of assistance from the cataphracts, the infantry began to rout, but unbeknownst to them, the escape route had already been cut off. Many drowned in the river, while some fell to their deaths from the steep hills of the valley. Khalid achieved a splendid victory, annihilating the imperial army while only taking around 4,000 casualties.
Upon hearing the news of the terrible tragedy, Heraclius left for Constantinople, bidding a last farewell to Syria: Farewell, a long farewell to Syria, my fair province. Thou art an infidel’s now. Peace be with you, O Syria—what a beautiful land you will be for the enemy. The emperor had neither the resources nor the manpower to defend the province. Instead, Heraclius decided to consolidate the defenses in Anatolia and Egypt. The emperor could not know that his efforts would prove to be in vain. The Eastern Roman Empire retained control over Anatolia. However, mere decades after Yarmuk, all the eastern provinces, from Syria and Mesopotamia to Egypt and North Africa, had been conquered by armies of Islam. Unlike its old rival – the Sassanid Empire – the Byzantine Empire would survive, fighting a bitter struggle against a dangerous foe, gradually transforming into a smaller but still powerful medieval state.